19 / 06 / 2024 — 29 / 06 / 2024 (Week 09 — Week 10)
1. Original Prototype Design


For the typeface, I maintained the header font (Montserrat Alternatives), but for the body font I could not find the exact font from Google Fonts, so I used a similar typeface (DM Sans) instead for project 2.


For images, I exported them from Adobe XD into Illustrator to adjust their size and position. I saved them as transparent PNG files and inserted them into the HTML code accordingly.


To make this feature more interactive, I used the transform scale code with the transition to 0.25s in my CSS sheet. The percentage of filter property lets the image stay in grayscale in a normal state and turn greenish when being hovered.


Same process were done for the logos located on the top left/ bottom center of the webpage. I used the inverted property on filter to make the logo change its shade to white when hovered with cursor.


Kim Seoyoon/ 0357755
GCD 60904 / Interactive Design / Bachelor of Design (Hons) in Creative Media / Taylor's University
Project 02
Table of content
LECTURES
Week 9 / Box Model Layout in CSS
Week 9 Slides
INSTRUCTIONS
Module Information Booklet
PROJECT 02
Part 2: Working Web Page (20%)
Task Instruction
The objective of this assignment is to transform your static prototype from Project 1 into a fully functional and interactive web page. You will apply your knowledge of web layout class to create a working website that closely aligns with your original prototype. Review your static prototype from Project 1 and analyze its layout, typography, color scheme, and imagery.
Use HTML and CSS to translate the design elements into code, ensuring a faithful representation of the original prototype.
Use HTML and CSS to translate the design elements into code, ensuring a faithful representation of the original prototype.
Aim for pixel-perfect precision while maintaining responsive design principles to ensure compatibility across different devices and screen sizes. Upload the file in Netlify, update your e-portfolio with all the processes documented in the blog, and submit the link as a submission.
1. Original Prototype Design
At first, we were instructed to analyze the initial prototype design we created in Project 1. Below is the original prototype layout I did in the previous project along with colours, and typefaces.

Fig 1.1 Original prototype design, Week 6
Link to my resume/ CV: Click Here
Colour Scheme
Fig 1.2 Colours, Week 10
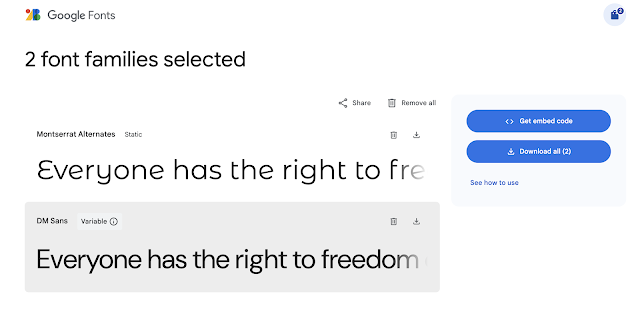
Typeface

Fig 1.3 Chosen typefaces (Montserrat Alternatives; DM Sans), Week 10
2. Translating to HTML

Fig 2.1 Modified HTML Codes, Week 10
To begin with the translation, I mainly referred to the webpage design exercise we did in class the same week. Adjustments like change of colour, typeface, positions and size were modified in this process.
Images

Fig 2.2 Exporting Images/Necessary Elements to Illustrator, Week 10

Fig 2.3 Project 1 Prototype, Week 10
Initially, my profile image from the original prototype design led to the 'About' page when clicked. Following this, I inserted a link to my image and let it change its colour when being hovered. The colour of my profile image was edited using a background fill layer and blending mode in Photoshop.

Fig 2.4 Adding a hyperlink to the image, Week 10

Fig 2.5 Editing on Photoshop, Week 10
To make this feature more interactive, I used the transform scale code with the transition to 0.25s in my CSS sheet. The percentage of filter property lets the image stay in grayscale in a normal state and turn greenish when being hovered.

Fig 2.6 CSS for photo, Week 10


Fig 2.7 Photo Normal; Hovered, Week 10
Same process were done for the logos located on the top left/ bottom center of the webpage. I used the inverted property on filter to make the logo change its shade to white when hovered with cursor.

Fig 2.8 CSS for logo, Week 10


Fig 2.9 Logo Normal; Hovered, Week 10
Final Outcome of Working Web Page

Fig 3.1 Final webpage fullscreen, Week 10
Link to my webpage: Click Here
Comments
Post a Comment